Usage of the NRP with NEST Desktop
When using the Neurorobotics Platform (NRP) in conjunction with the NEST Server, you have the option to utilize a powerful and user-friendly graphical user interface (GUI) known as NEST Desktop. Here, both the NRP and NEST Desktop act as clients communicating with the NEST Simulator server.
Note
The integration of NRP with NEST Desktop is currently supported only through a specialized local Docker installation with the use of Docker Compose.
Installation
Follow the steps described in Installation with Docker up to “Running the NRP” (do not run ./start_nrp_docker.sh script).
Run NRP with NEST Desktop: Execute the script starting Docker Compose with NRP and NEST Desktop.
cd "${HBP}"/nrp-user-scripts
./nrp_nest_desktop.sh # accepts any docker compose parameter e.g. "-d" daemon mode
Docker will then download the necessary images and initiate the containers.
Access the NRP Interface: Open your web browser and navigate to localhost:9000. Log in with the credentials
nrpuser:password.
Usage Example
Follow these steps for a smooth experiment using NRP with NEST Desktop:
Navigate to the NRP at localhost:9000 and log in.
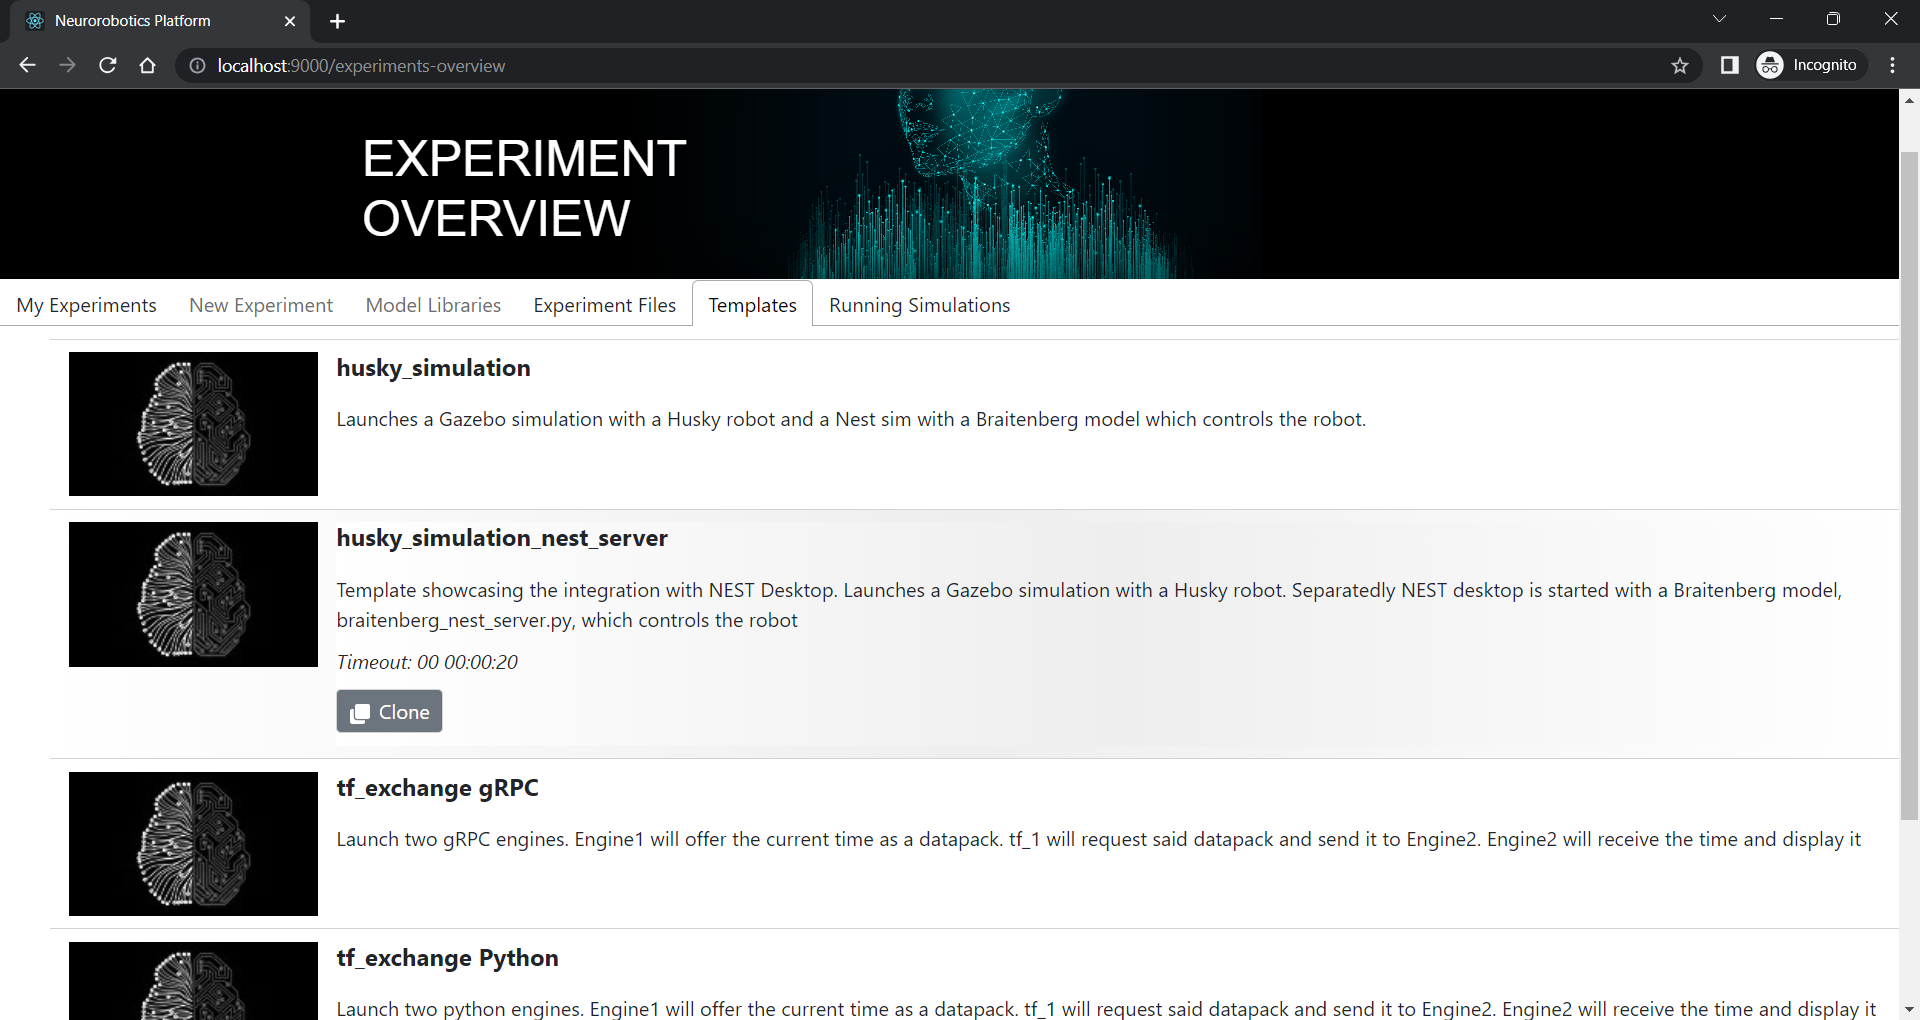
Select the Templates tab, then clone the husky_simulation_nest_server.
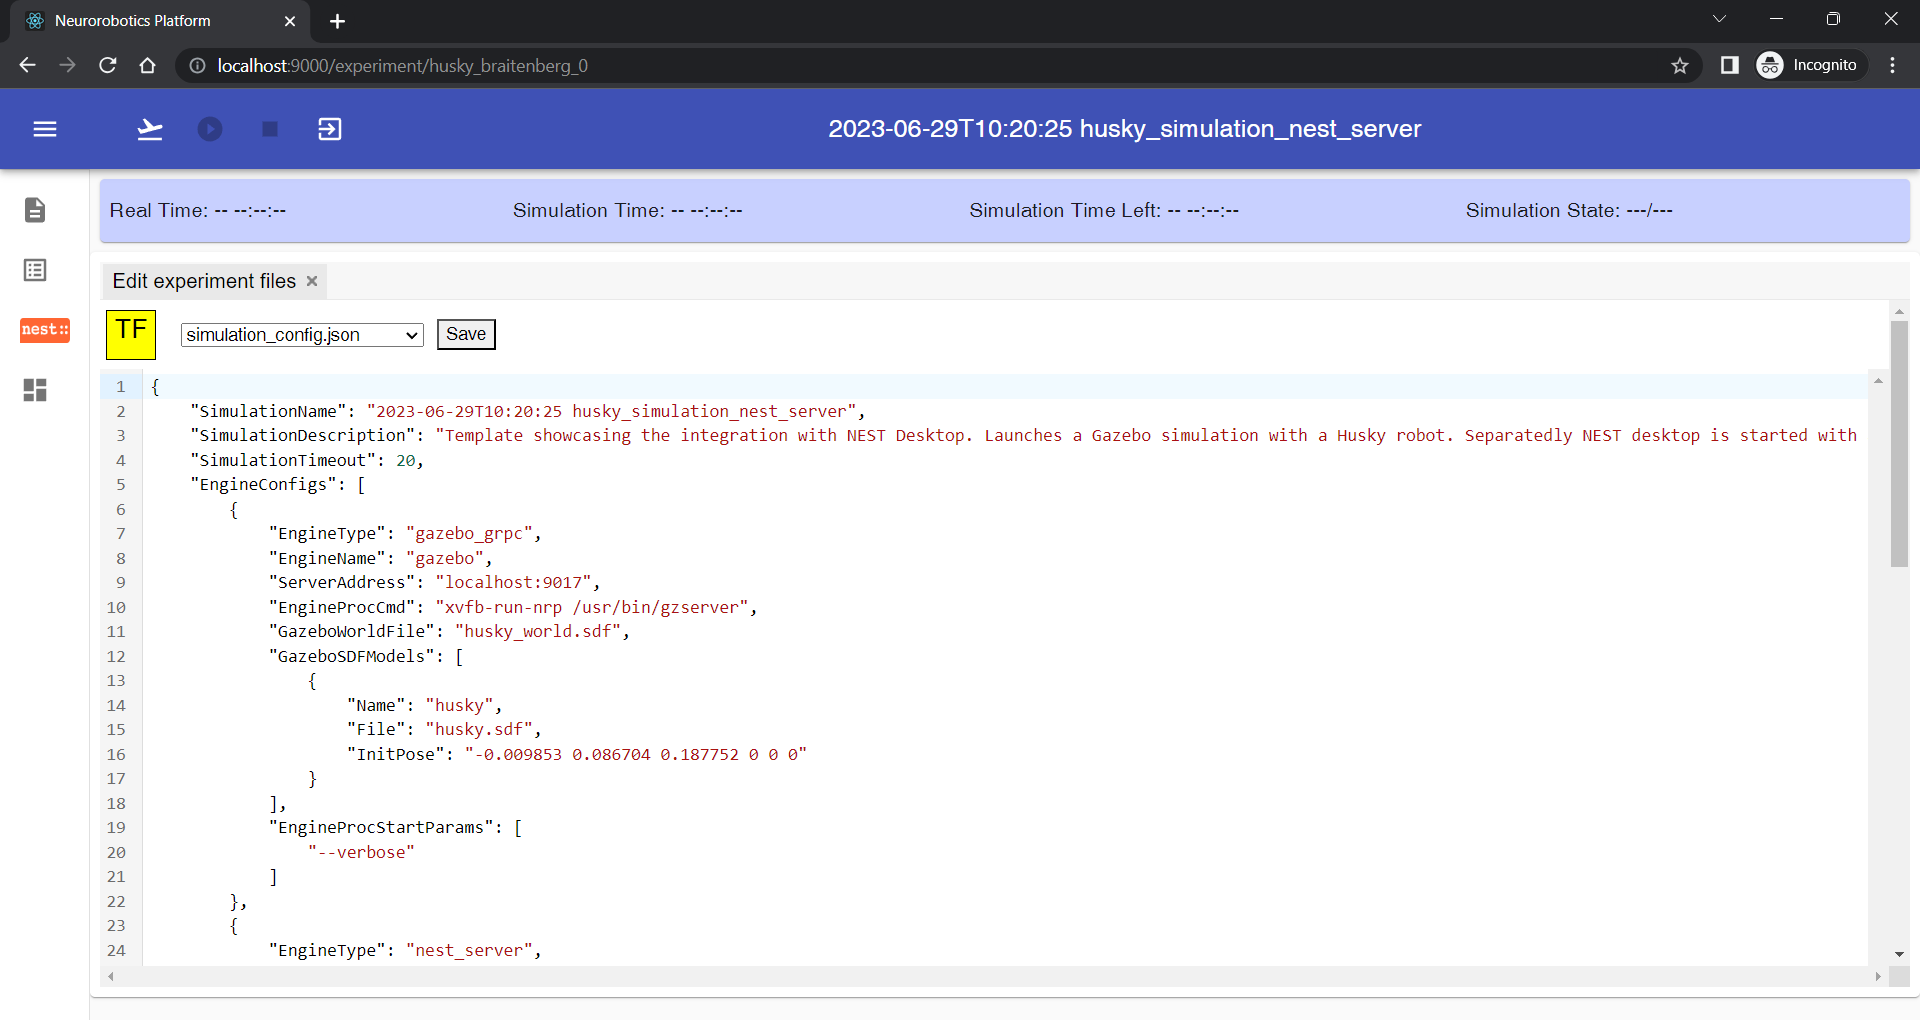
Under the My Experiments tab, select the cloned experiment and click the Open button.

In the NRP experiment workbench, find the NEST Desktop icon in the left panel and drag the tool in the working area..
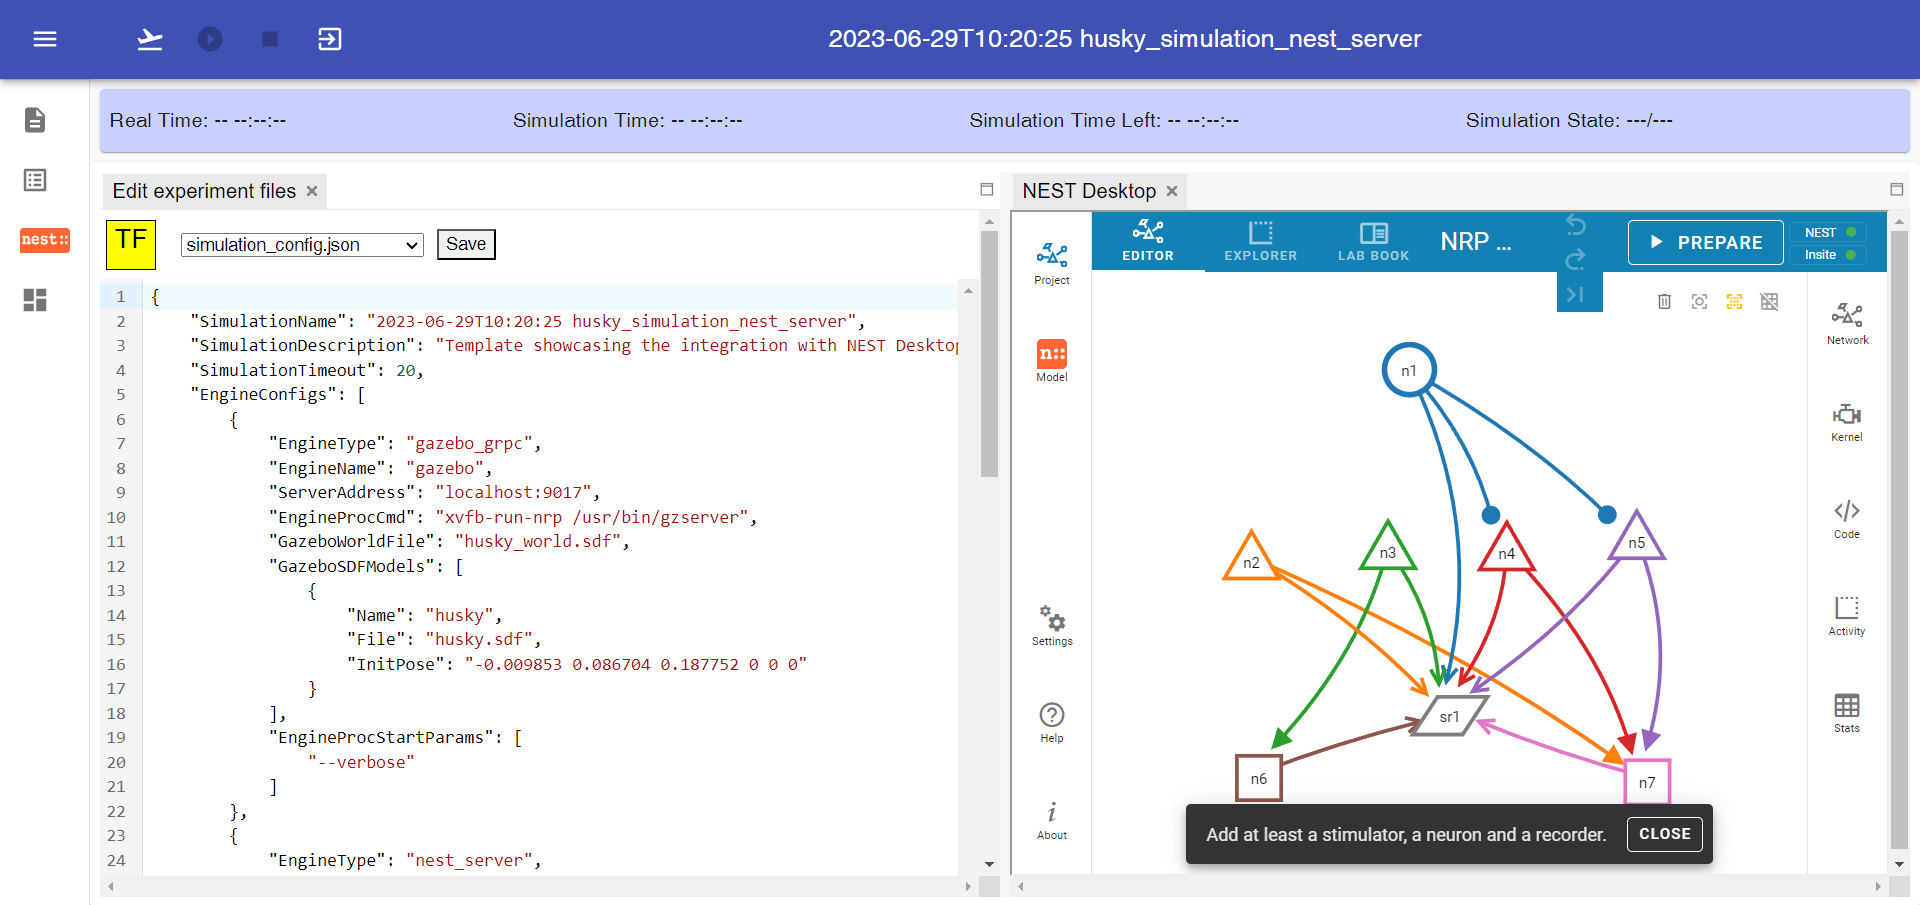
Download the NEST Desktop project
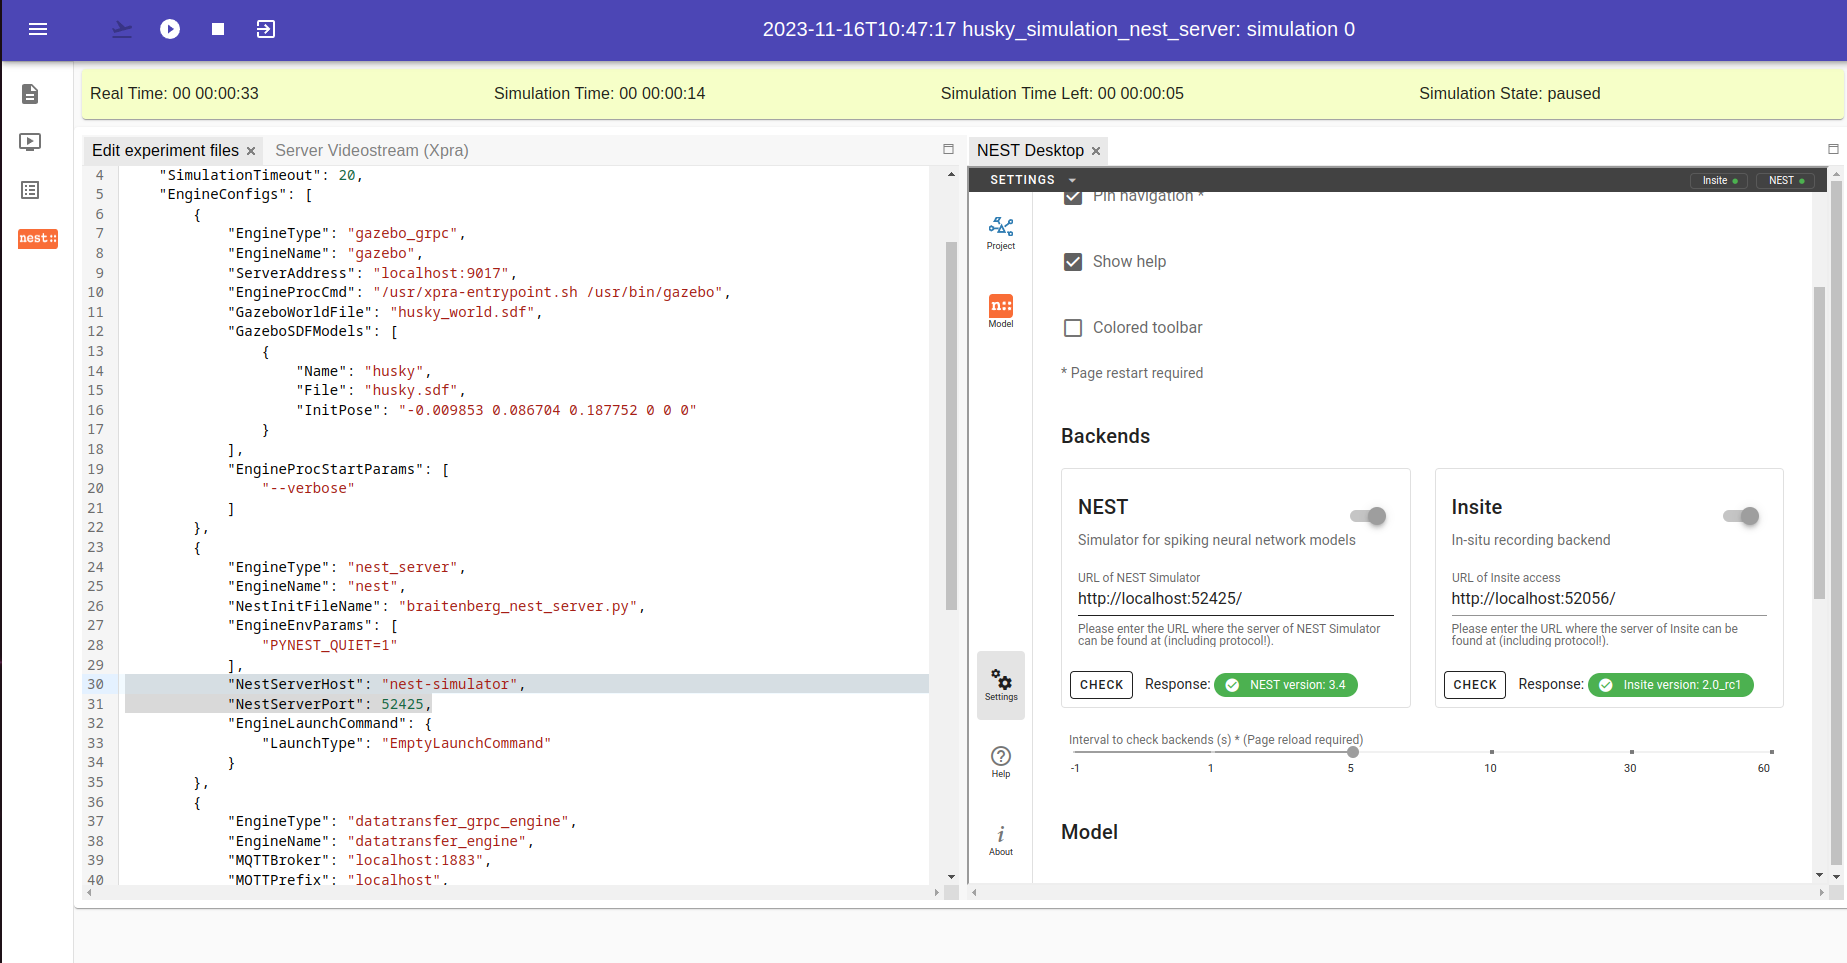
configuration fileand import it into NEST Desktop.Ensure that both NEST Desktop and the NRP simulation configuration file use port 52425 for the NEST server connection and port 52056 for the Insite connection. NEST Desktop will verify the availability of these ports.
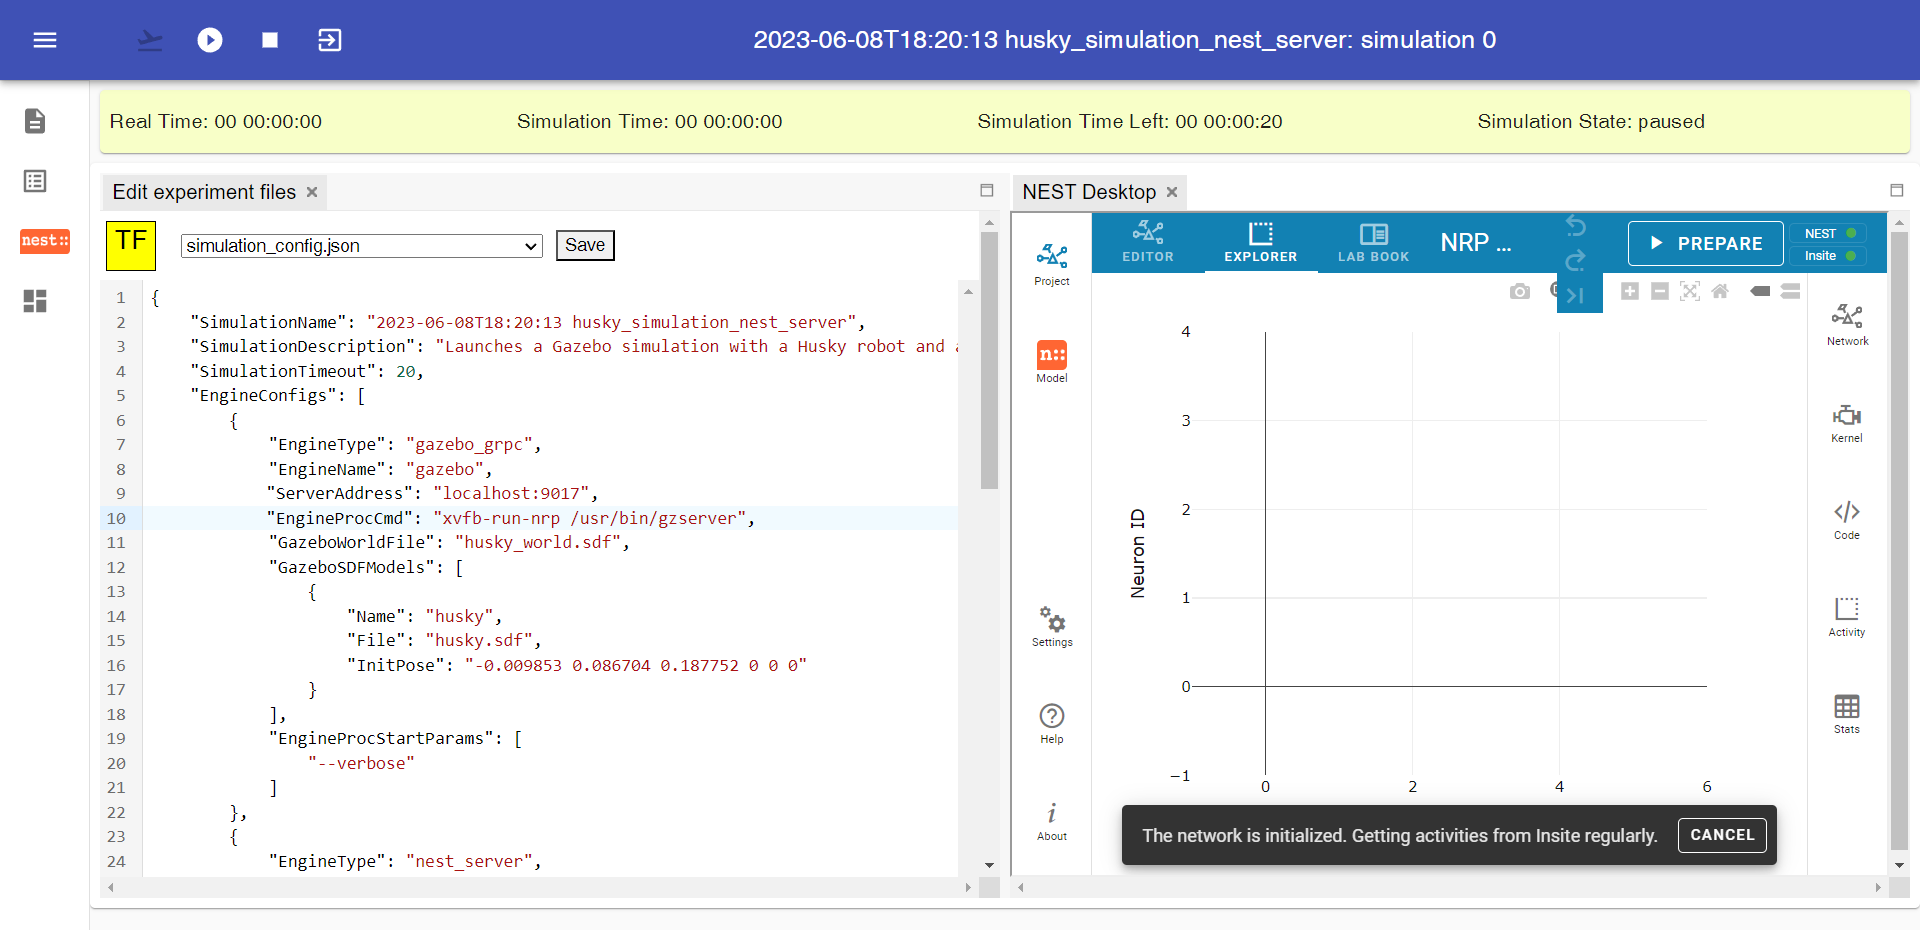
Optionally, modify the neural network configuration. Ensure that any modifications are compatible with the experiment settings in NRP. When ready, select all stages except Simulate and press the PREPARE button to configure the NEST neurons. The NEST Desktop will become ready to receive spikes signals.
Press the Launch button to initialize the simulation in the NRP. The status bar should become yellow when the simulation is ready to be started.
Note
Configuring NEST should be completed prior to launching the simulation in the NRP.
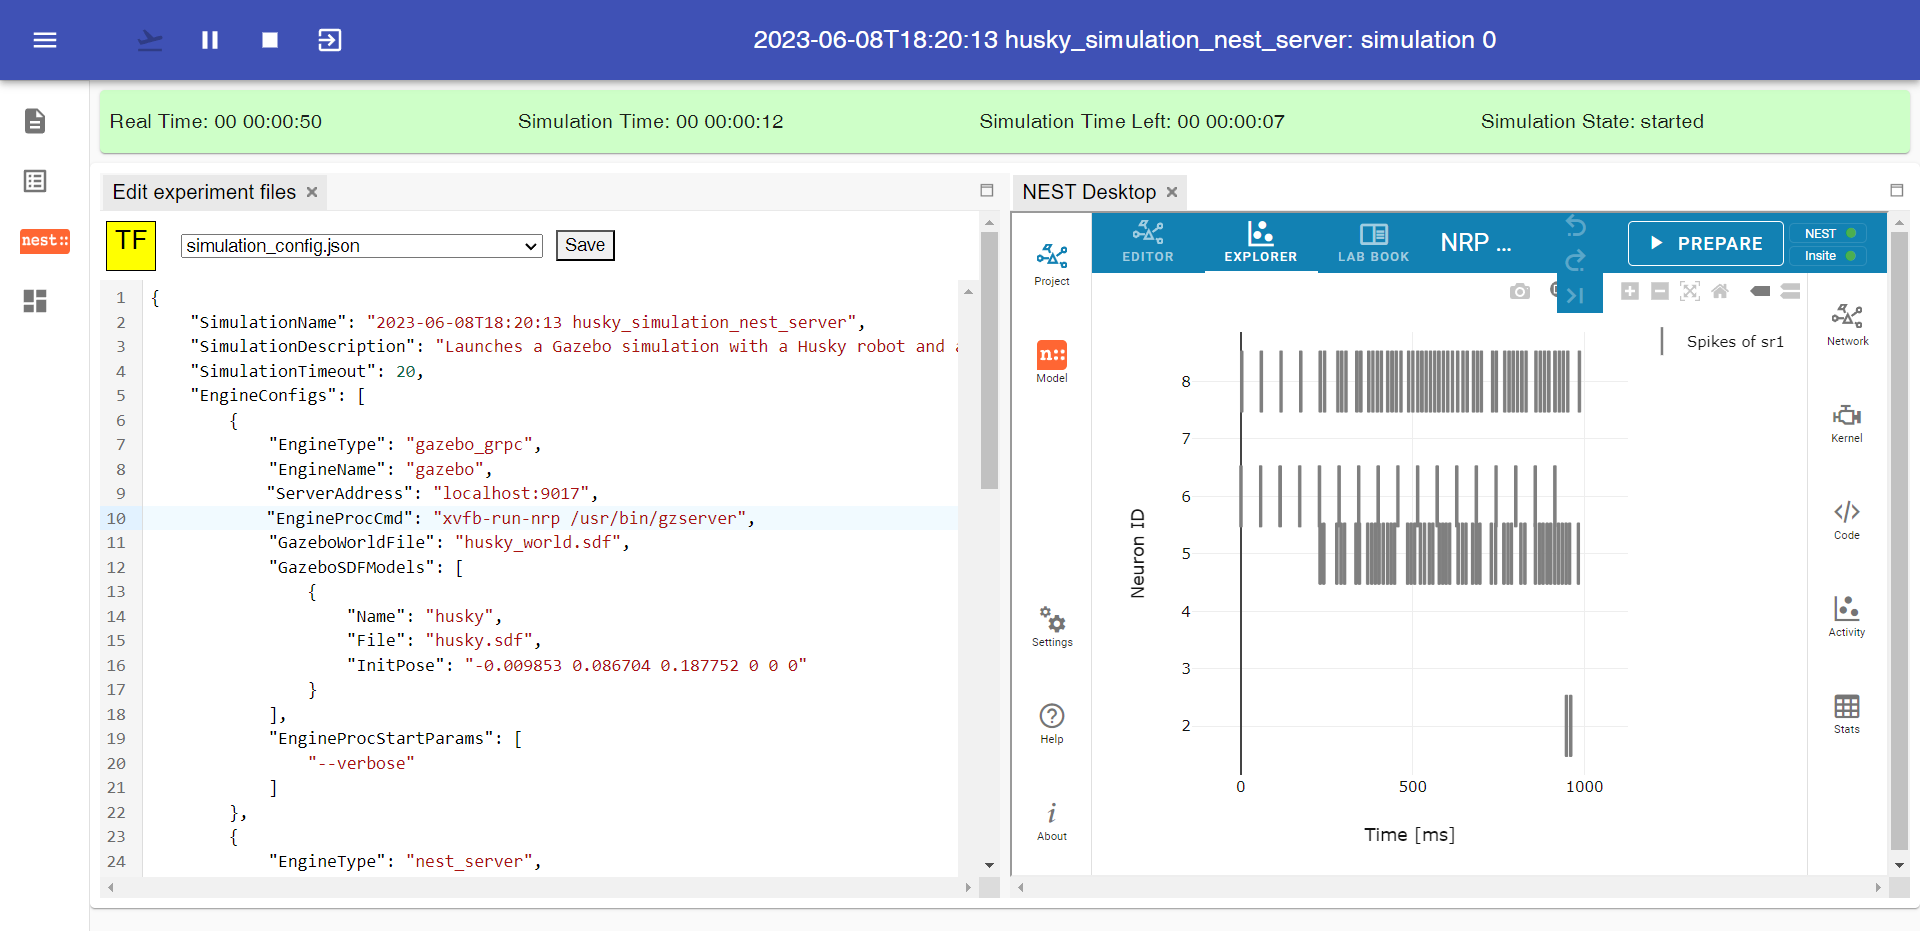
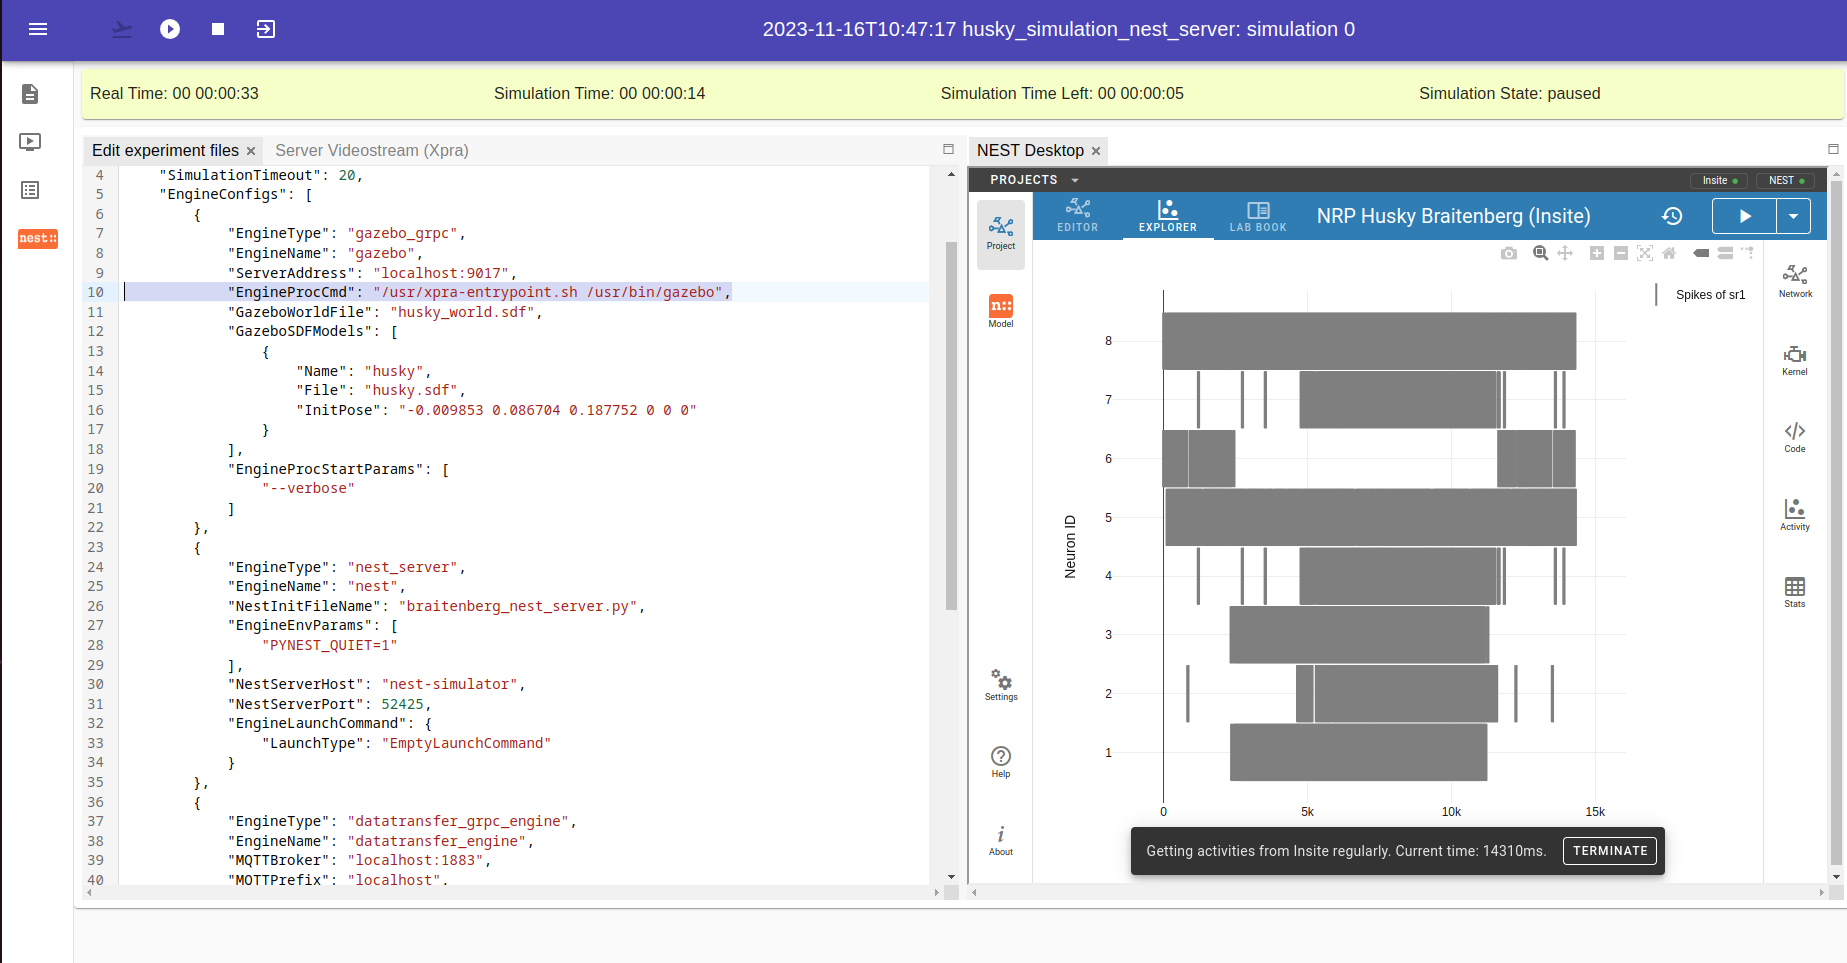
Press the Start button to run the simulation and observe the spikes activity in the NEST Desktop.
Note
Remember, network configuration in NEST Desktop should always be completed before launching in the NRP.
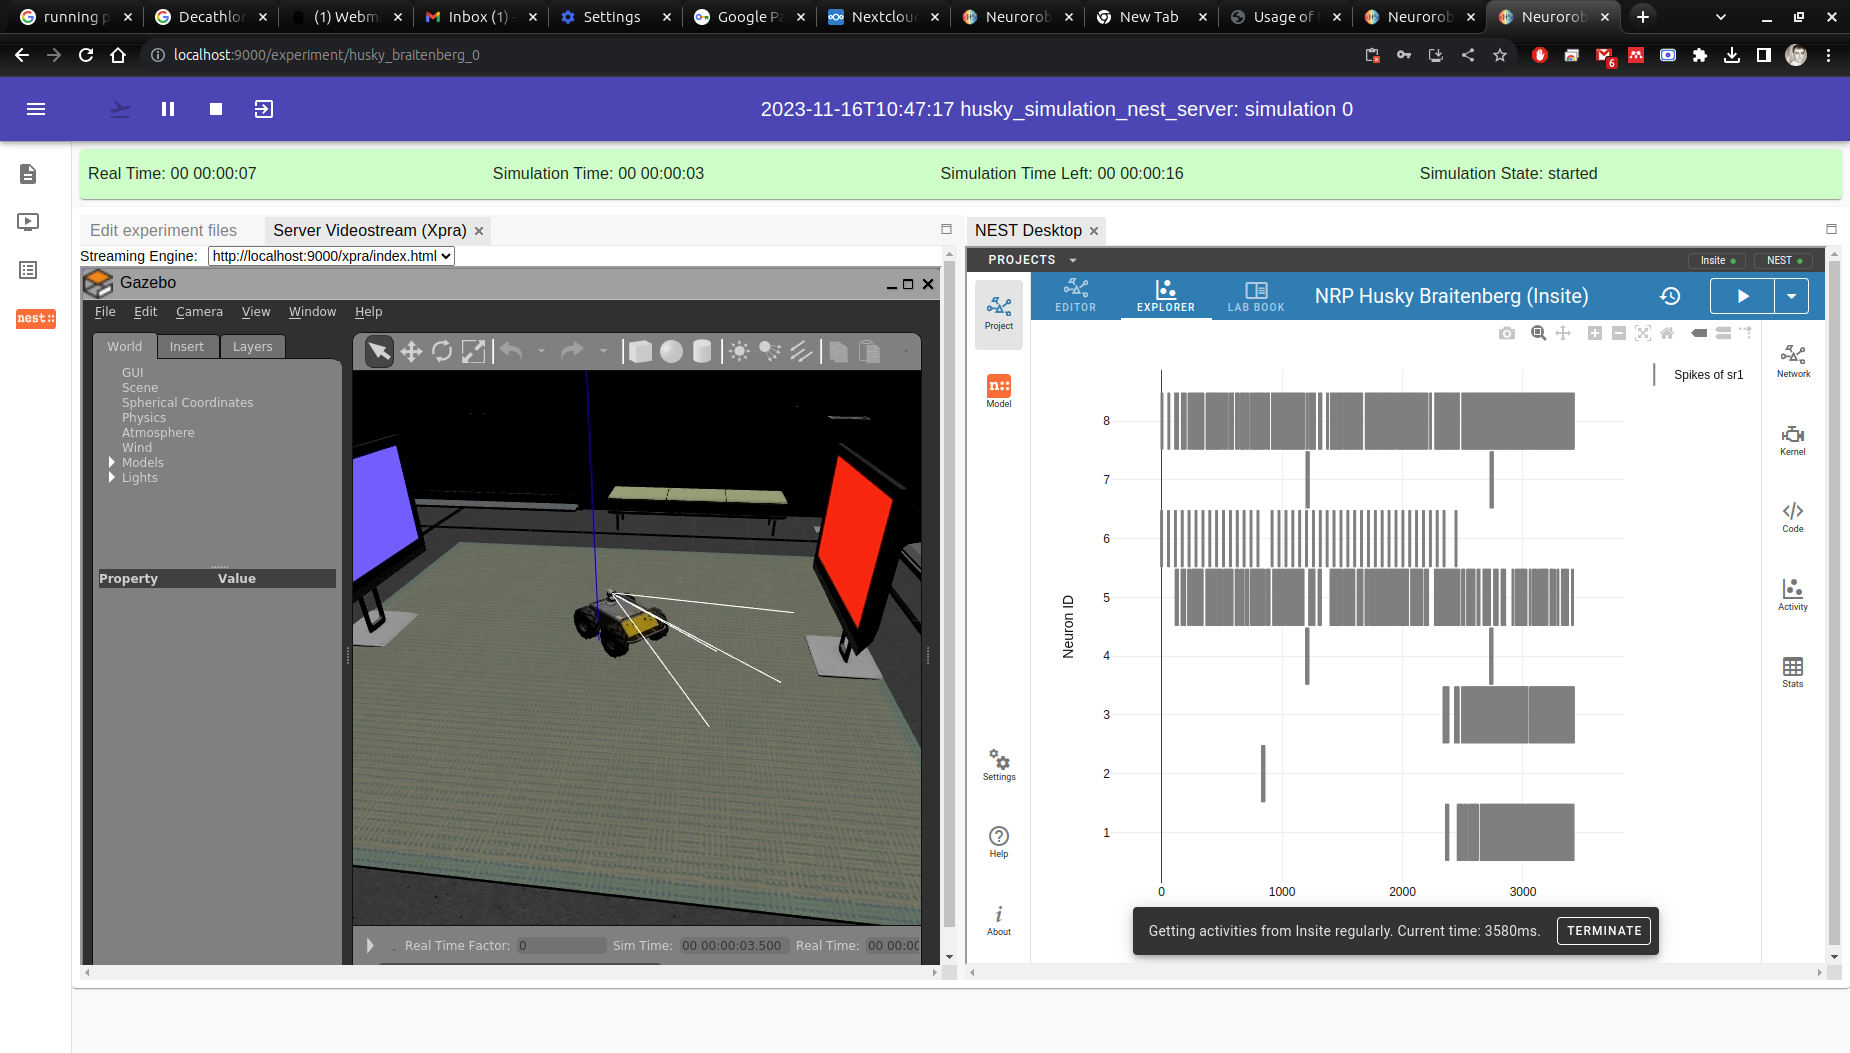
In case the XPRA is activated for the Simulation, you can observe the robot simulation as well.
Happy experimenting! Utilize the combined power of the NRP and NEST Desktop for immersive neural network simulations.